An Integrated Development Environment (IDE) is a peice of software used by programmers to write code easily and quickly. Generally, IDEs include a customized spell-checker and auto-correction tool specific for the syntax of the programming language being used. They also contain compiling tools for writing the software to a microcontroller or computer and debuging tools for finding issues with the code.
Windows Install
- In your web browser, go to www.arduino.cc
- Under the software tab, click downloads
- Click "windows installer"
- Click "just Download"
- If necessary, click "save file"
- Once the file has finished downloading, navigate to your downloads folder and double click "Arduino-1.8.8-windows.exe"
- A warning may appear asking if you want "this app to make changes to your device". Click yes.
- Click your way through the installer. Three times in the install process a window will open asking "would you like to install this device software". Always click Install.
- Once the software is finished installing, go to the start menu and find "Arduino".
- The first time you launch the software it's going to ask if you want to let it through the firewall. Click Allow Access.
- The Arduino software is installed, you're ready for your first Arduino program!
MacOS Install
- In your web browser, go to www.arduino.cc
- Under the software tab, click downloads
- Click "Mac OS X".
- Click "Just download"
- Once the file has finished downloading, navigate to the downloads folder and move Arduino.app to the applications folder.
- Navigate to the applications folder and launch Arduino. The first time you start it a window will open asking if you really want to open. Click "Open".
- The Arduino software is installed, you're ready for your first Arduino program!
Arduino-Uno Setup
First Run:
- Plug the Arduino into your computer using the USB cable
- Under the tools menu, select "Board:", then "Arduino/Geniuno Uno"
- Still under the tools menu, select "Port:", then the serial port for the Arduino
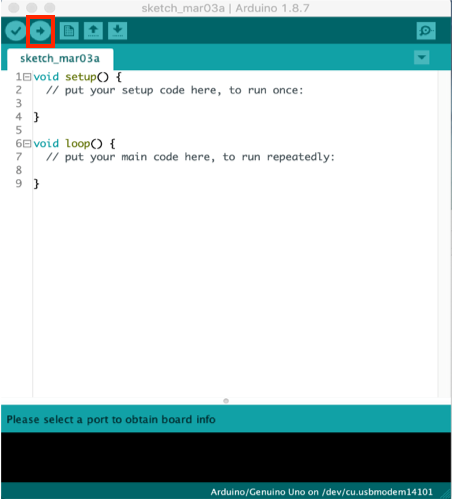
- To check that things are working, under the tools menu, click "get board info". A menu should open with a bunch of information about your Arduino such as the serial number. If no window opens, get help.
- Click the Upload button to send the software onto the Arduino
Subsequent Runs:
- Click the Upload button to send the software onto the Arduino